

Step by step instructions: how to connect the automatic washing machine to the sewerage system with your hands
 Proper installation of a new washing machine will allow you to avoid problems with water leaks and incorrect operation of the device in the future.
To connect the washing machine is not as difficult as it may seem. However, you should remember a few important rules.
In this guide, we will show you step by step how to connect the washing machine and conduct it to the drain with your own hands.
Contents
What tools are needed to install the washing machine
When installing an automatic washing machine, you may need:
- a construction level;
- threaded adapter;
- ball valve;
- Fitting, tee or crimp coupling;
- a set of adjustable wrenches and wrenches;
- Phillips or flat-head screwdriver (not always required);
- flexible hose.
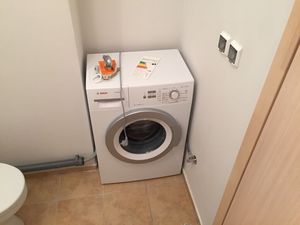
Where to Install a Washing Machine
The most popular and optimal place to install a washing machine is under the sink in the bathroom. In second place is built into the kitchen unit.
But in fact, the question of installing appliances is the business of each individual user.
The only important thing is that the device has free access to communications: drain pipes, plumbing and mains.
Much more important point when installing the washing machine is its proper alignment.
If it will be installed ?? incorrectly, in the future it will move during the washing and very noisy. Therefore, it is necessary to adjust the height of the legs.
To do this, use a construction level and a flat wrench to unscrew the special fastening nuts in the base of the equipment.
Adjusting the height of the feet will help avoid loud operation of the unit, especially during spinning. And do not forget to then tighten the locknuts on the body of the device.
The connected and aligned washing machine can be placed on an anti-vibration mat, which will further reduce the noise level of the appliances.
Requirements for the electrical connection for the washing machine
As for the connection to the power grid, then everything here is quite simple. The only thing you need to pay attention to is the appropriate parameters and grounding of the socket - according to the standard, the voltage of 220-240 Volts at 50 Hz is enough.
It is also not recommended to use extension cords or splitters. Of course, the cable should not come into contact with open flame sources.
Connecting to different types of pipes
Depending on the type of pipes used, connecting the washing machine to the plumbing will require different measures on your part.
Unfortunately, in most cases, you can not do without the use of a welder, because you need to ensure a tight connection of pipes and fittings.
Connecting to a metal pipe
If your pipes have a special faucet for connecting household appliances, it is enough to simply screw the hose into the faucet, using a nut and silicone grease for sealing.
Otherwise, you will have to make a cut-in: to do this, you need to put a crimp sleeve on the pipe and fix it with bolts. Then a hole is drilled in the pipe and it is connected to the socket through a special threaded fitting.
When all the steps are done, a faucet and a drain hose are connected to the appropriate hole.
Connecting to a metal plastic pipe
When working with a metal-plastic pipe, you will first have to cut the pipe with a special pipe cutter and install a metal tee with a stopcock in it.
It is already connected to a flexible hose, i.e. this device and serves as a conductor of the pipeline to the household appliance.
Connecting to a polypropylene pipe
The easiest way to connect the washing machine to a polypropylene pipe.
In brief, in the same way as with metal-plastic pipes, it is necessary to install a tee on the pipe, to which the hose of the household appliance is connected through a stopcock.
However, polypropylene pipes are not connected butt to butt, and individual faucets, which means you do not need to weld sections of pipe, it is enough to use specialized glue.
Instructions for connecting to the water system
Before you start installing the washing machine, open the faucet and drain the water with any possible impurities that may have accumulated in the pipes.
Make sure the water is completely clean before turning on the washing machine.
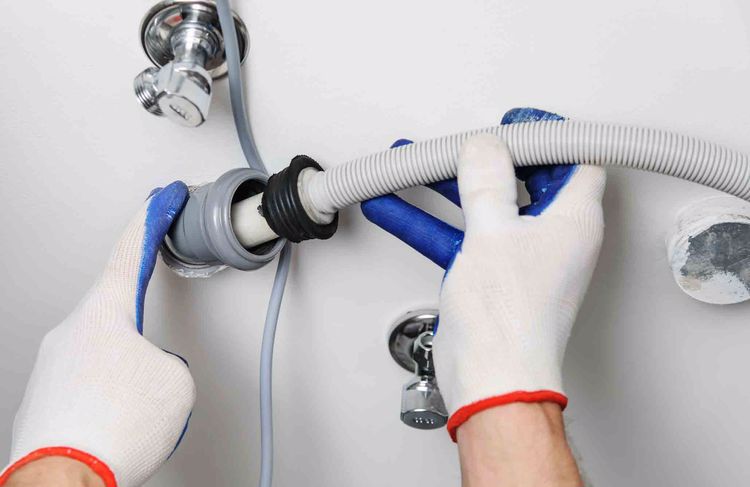
So, screw the fill hose into the tee with a shut-off valve, tapped into the pipe. It has a flat surface and a threaded tip, which is better to wrap with fum tape.
Tighten the hose by hand, as the threads of the outlet are very soft and the use of a tool can damage it.
If your model of washing machine does not have a permanently installed filler hose, you can also screw it into the washing machine yourself. If all is well, can open the water faucet and check for leaks.
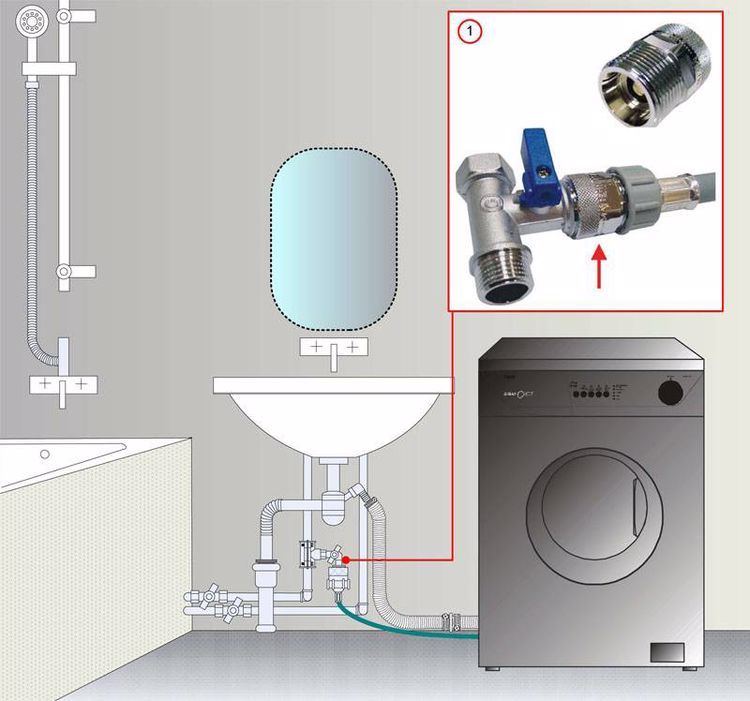
There is an important point: the fill hose often has a valve that shuts off the cold water supply (called a solenoid valve), which can prevent water leaks in the house.
This technology is popularly called an Aquastop. In models with this system, the plumbing is already integrated with the solenoid valve.
After connection, you should carefully open the valve and check the tightness of the installation, but on your own such a hose should not be extended.
Hoses with solenoid valves have a certain factory length. In this case, the manufacturer cannot guarantee the strength or tightness of the installation.
Organization of the drain into the sink or toilet bowl
The correct height of the drain should range from 40 to 100 cm from floor level, although these values (especially the lower ones) may vary depending on the model, so it is better to respect the upper limit.
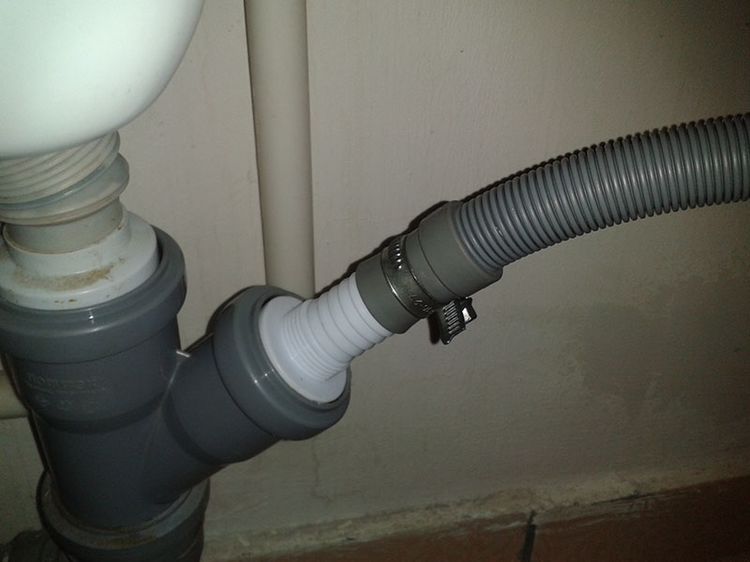
Sometimes the factory hose connection may not be sufficient and may need to be extended. This will require connecting the two hoses, for which special double-sided fittings are used.
Most often this is a fitting with 3/4 diameter holes, which are covered on both sides with collar seals that do not allow water to leak out of the washing machine.
Thanks to this set water from the washing machine can be drained even from household appliances that are far from the sewer.
As mentioned, for many washing machines, such as most Bosch or Indesit appliances, you can buy a hose extension or simply purchase a longer version that will direct the water straight down the drain.
A good two-meter hose is more than enough to connect your washing machine in the right place in your home. You can adjust the length of the hose to suit your needs if necessary.
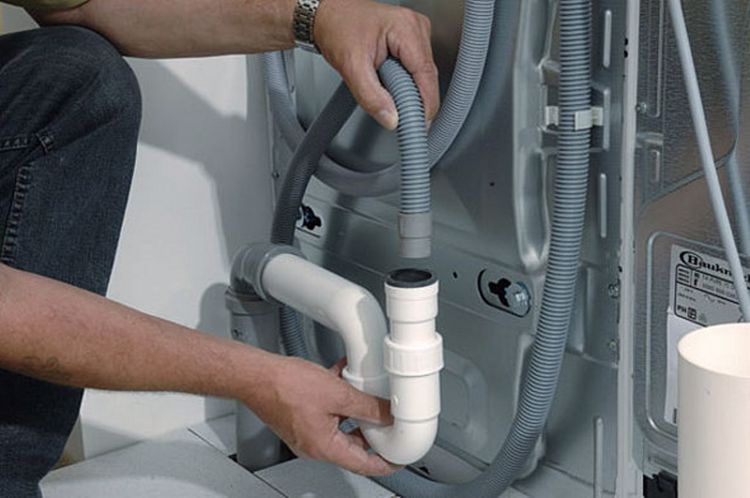
Simply connect the drain pipe to the siphon. Place the inlet pipe in an upright position.
This way, in case of an emergency, you minimize the risk of flooding the room.
It is also worth installing special gaskets, further eliminating the risk of unpleasant odors. If you connect the drain hose to the siphon, you may need a hose clamp of the appropriate size.
How to tap into a sewer pipe
When integrating a variety of household appliances into the centralized water supply systems, common in the CIS countries, it is required to make certain actions to tie into a common pipe.
And the pipe itself may be old and rusty, without any special taps to connect the appliances, which further complicates the process of connecting to it.
So please note that the described actions are recommended to entrust to professionals, as a non-professional risks simply damaging the communication.
The way of cutting into the sewer pipe with a tee
At the beginning of the article, we described ways to connect household appliances to different types of pipes.
Now we become more detailed on the process itself:
- So, cutting into cast iron pipes, most common in homes in the post-Soviet states, requires special adapters - tees that provide a tight connection between the pipe and the filling hose of the washing machine. Purchase such a tee can be purchased at any hardware store.
- Then, before you start the work, you need to completely shut off the sewer system. In apartment buildings, this means that the neighbors for some time should not use the sewer system, that is, do not use the sinks, sinks and toilets. If you cannot reach an agreement with your neighbors, you need to prepare waste containers.
- First you need to make all measurements of communications at the place of installation. Since you will need to cut a whole segment of pipe, make sure that the measurements are correct.
- The first thing to do is to cut out the part of the pipe where the tee will be integrated. You can use a special pipe cutter for this, but you can do it with a bolt cutter. In this case, the grinder may not reach some places, so you can finish the procedure with a regular hacksaw. Of course, you need to be careful, because cast iron pipes are very fragile.
- Now you need to mount the tee. Start by placing it on the short part of the rack and move it aside. Then move the movable part of the pipe to the same side and put it on the tee. After that, you need to align the riser line and insert the pipes into the tee as deeply as possible. If necessary, you can temporarily secure the pipes with a bracket to make it more comfortable.
- Finally, you need to connect the old pipe to the tee. This is a very difficult procedure, especially in old Soviet houses, where the pipes run extremely low and in principle difficult to weld. In this case, to joint the joints, you should use a high-quality silicone sealant or epoxy. To avoid leaks, it is also recommended to pay attention to sealing tape, which works well with cast iron pipes. It is enough to simply wrap the edge of the pipe with tape in a couple of layers.
It should be emphasized that all of the above procedures are carried out by welding, so too point marking is not necessary.

The method of tapping into the riser without cutting the pipe
The second common way to cut into the pipe requires a special collapsible clamp, consisting of bandage - the crimping material of steel, and the collar - the inner sealing gasket.
To one half of the clamp attached branch pipe, which connects directly to the sewage pipe, and therefore to a certain plumbing product.
So, let's look at the order in which the installation of the clamp:
- First it is necessary to completely shut off the sewer system in the house. As mentioned earlier, to do this, you must ask the neighbors from above and below not to use the plumbing for a while. You also need to shut off the water, but this is a little easier - the landlord can independently shut off the water risers. To do this, each apartment has two appropriate valves - hot and cold water.
- Next, you need to use a drill to make at least two holes in the pipe and in the "ears" clamp. Their size depends on the diameter of the bolts used to secure the clamp. If the band is more than 6 centimeters in width, you should make not two, but three holes.
- The next step is to fix the clamp with the spigot on the polypropylene pipe. Mounting the clamp is made by raising the "ears" so that they could encircle the entire pipe and the subsequent tightening of the bolts.
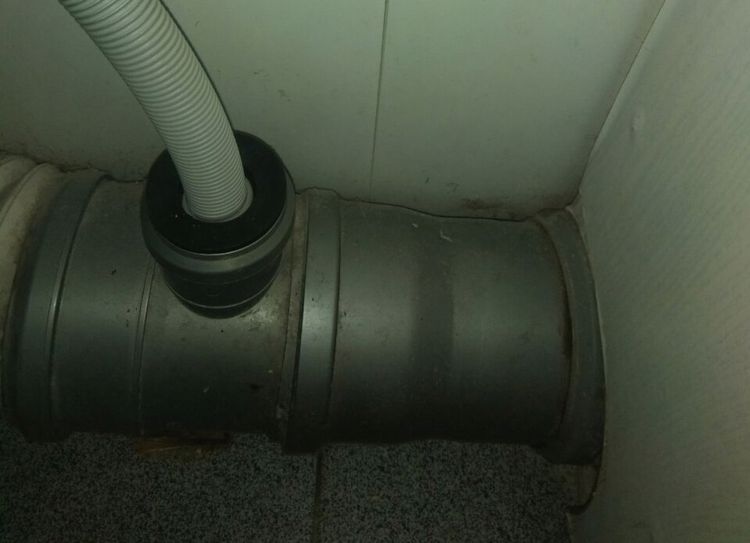
- After that, a rubber seal is inserted into the spigot, repeating the shape of the corrugation.
- Finally, the branch pipe is inserted into the corrugation itself.
You can also make such a clamp yourself.
Here are step by step instructions for making a pipe clamp at home:
- Choose a suitable polypropylene pipe. The main condition is that the inner cross-section must be the same as the cross-section of your pipe.
- Then it is necessary to cut a segment from this pipe, the size of which exceeds the length of the external section of the pipe by about 5-10 centimeters.
- This pipe should be cut into two parts using a hacksaw (lengthwise). One half you will use as the outer back element of the clamp.
- In the second half you need to make a hole, the cross-section of which should correspond to the outer diameter of the installed spigot.
- Finally, in this hole stick the branch pipe and give the clamp a good sealant inside.
- The last step is the direct fixing of both structural elements of the clamp on the pipe.
We would like to point out that in order to ensure complete sealing of the joints, metal band clamps should be used when securing the edges of both halves.
The way of tapping a branch pipe into a sewer
Many owners when trying to connect household appliances to the sewer system have a very unpleasant problem - the pipes, in which it is necessary to make an incision, are literally walled up in the wall.
And it is a common situation not only among Soviet houses, but also among many new buildings. Therefore, experts do not waste time creating additional input into the siphon, and simply cut in an outlet directly into the sewer pipe.
To perform this operation, you will need the following components:
- Electric drill with a large enough drill bit;
- clamp to secure the outlet from the washing machine;
- sanitary fum tape (fluoroplastic sealing material);
- metal strips.
Keep in mind that since you are working directly with the sewage pipe, the procedure will not be pleasant. Although, if you drain the water, the unpleasant smell will decrease.
So, let's look at the entire installation process step by step:
- Metal tapes need to be fixed on the outlet. To do this, as in the previous described method, a clamp is mounted.
- In the pipe is drilled in the form of a circle, which should be slightly smaller than the cross-section of the branch. This requires a large drill bit to widen the hole if necessary.
- Branch pipe wrapped with rubber tape, and then quietly inserted into the hole. Keep in mind that it should fit as tightly as possible, so do not be afraid to use as much tape as necessary. Your goal is a tight connection.
- Finally, ????? just have to fix the pipe to the wall. To do this, you need to securely attach the metal strips to the wall with dowels, and then place the pipe there.
Also, do not forget to rewrap the edges of the pipe with sealant before tapping to ensure that they are as strong as possible.
Useful Video
From this video you will learn how to connect the washing machine in the countryside and in the cottage without plumbing:
